Table of Contents:
- 1 Arduino – general pinout overview
- 2 Add Your Heading Text Here
- 3 Arduino – analog pins
- 4 Arduino – digital pins
- 5 Arduino – digital pins with PWM waveform generation function
- 6 Arduino – communication pins – UART interface
- 7 Arduino – communication pins – SPI interface
- 8 Arduino – communication pins – I2C interface
- 9 Arduino – interrupt pins
- 10 ICSP connector in Arduino UNO R3
- 11 What else is worth knowing about the pinouts in Arduino?
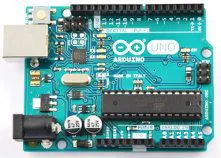
Arduino minicomputers offer their users a lot of features to use, and this is what makes them ideal for many different and interesting projects. This article presents description and features of Arduino UNO R3 board based on 8-bit AVR ATmega328P microcontroller.
Arduino – general pinout overview
Most Arduino models, including the most popular one known as Arduino UNO R3, are equipped with 8-bit AVR ATmega328P microcontroller. The tracks on the PCB have been routed to create connections between the microcontroller’s pinouts and the pinout strips, thanks to which we can connect the Arduino board to external devices, such as Arduino Shield modules (e.g. communication modules), as well as single elements, such as LED diodes, transistors, sensors, potentiometers and others. The pinout of the Arduino UNO R3, includes 14 digital pins, 6 analog pins, as well as power connectors, a USB connector and a connector for an optional external USB-ASP programmer. Pinout of Arduino UNO R3 board is shown in Figure 1.

Add Your Heading Text Here
Just like any other electronic device, a power supply voltage is required for the Arduino board to function. Power to the Arduino UNO R3 can be supplied in three ways.
The first way is to connect an external power supply to the 5.5mm/2.1mm socket. The recommended value of the output voltage from the power supply is between 7V and 12V DC. A supply voltage of the same range, can also be supplied from the power supply to the contact plates or other similar module, by connecting them to the “VIN” pin. Power can also be supplied via an on-board USB type B connector – either when the Arduino is connected to a host computer or powered by a smartphone charger.
The type of power supply should be selected according to the power requirements of the application you are creating based on the Arduino board. The “VIN” pin is connected to the plus of the power supply via a rectifying diode, which prevents damage to the module in case of reverse polarity voltage connection. The USB power supply, on the other hand, provides a maximum current capacity of 500mA. The Arduino pins can operate at 3.3V or 5.0V (pins “3V3” and “5V” respectively), according to the external hardware specification.
Regardless of the chosen power source, the circuit must close via ground – there are five “GND” pins on the Arduino board, which are galvanically connected to each other. The “RESET” pin, when shorted to ground (e.g. using on-board button), causes momentary disconnection of power supply and restarting Arduino. On the board, there is also “IOREF” pin, to which a reference voltage is connected.
Arduino – analog pins
The analog pins on the Arduino (“A0” – “A5”) are connected via a multiplexer to the input of the analog-to-digital converter, which is an integral part of the ATmega328P microcontroller. The analog-to-digital converter (ADC) allows to convert voltages (analog signal) from 0V-5V into digital form expressed in bits. The resolution of the ADC in Arduino is 10 bits. This means that the number of voltage quantisation levels at the ADC input is 1024 (takes values from 0 to 1023), and the voltage is measured with a resolution of 4.89mV.
The resolution can also be extended by applying a voltage lower than 5V to the “AREF” pin, to which a reference voltage should be applied, against which the converter measures the voltage on the inputs applied to it. The sampling frequency of the ADC is around 9600Hz, which means that we can feed the input of the converter a signal that will be flawlessly converted to digital form until the highest frequency in its spectrum exceeds half of the sampling frequency of the ADC in Arduino, i.e. no more than 4800Hz. Typical applications for an ADC on an Arduino include analogue sensors, potentiometers, and controlling voice commands via microphone (VoIP) that can be sent remotely to another device via the internet.
Arduino – digital pins
The Arduino Uno has 14 digital pins (“D0” – “D13”) that can be configured as inputs or outputs, with the digital pin “D13” connected to an on-board LED that allows the board to be checked for proper operation, for example with a short program code that controls the cyclic flashing of the LED. The maximum current capacity of a single digital pin is 20mA. Digital pins operate on logic states that represent a bit value – a low state represents a zero bit and a high state represents a one bit.
Typically, when the digital pins on the Arduino are set as outputs, the voltage for the low state is 0V and for the high state is 5V. On the other hand, if the digital pins are configured as inputs receiving signals from external devices, the different logic levels are defined by voltage ranges. Thus, Arduino interprets the input voltage from 0.0V to 0.8V as a low state (“0”), and from 2.0V to 5.0V as a high state (“1”). The range 0.8V – 2.0V represents a forbidden state, where no change of logic state is allowed.
Arduino – digital pins with PWM waveform generation function
In addition to their standard functionality, digital pins “D3”, “D5”, “D6″, D9”, “D10” and “D11” can be used to generate a PWM waveform (a rectangular waveform with variable fill factor). By default, the frequency of the PWM signal in Arduino is set to approximately 490Hz. The fill factor, on the other hand, determines for what part of the duration of a single period, a low state appears on a digital pin in PWM mode, and determines the average value of the entire period of the signal.
For example, if the fill factor of the PWM signal generated on the “D3” pin is 40%, then with the peak value of the voltage being 5V, the average value of the whole period voltage of such a signal will be 2V. Accordingly, the higher the value of the fill factor, the higher the average value of the PWM waveform. Typical applications for PWM signals in Arduino are speed controllers for electric motors, brightness controllers for LED lighting, and music synthesizers.
Arduino – communication pins – UART interface
To communicate with external devices, the Arduino uses several different communication protocols. One of these, is the Universal Asynchronous Receiver-Transmitter (UART) protocol. This is a serial protocol, which is implemented using digital pins “D0” (“RX” – receiver – receives signal from external device) and “D1” (“TX” – transmitter – sends signal to external device). This interface enables communication with external modules, and also with a computer – it is connected to the pins for the USB port.
Arduino – communication pins – SPI interface
Another interface that the Arduino uses to communicate with external devices is SPI (Serial Peripheral Interface) – this is a serial protocol that allows a microcontroller to communicate with one and more devices, and also allows synchronous communication with another microcontroller, in a master-slave topology, where the master is the master and the slave is the slave, with the microcontroller being the master in the standard topology. On the Arduino UNO R3, the SPI interface pins include:
- SS (Slave Select) – “D10” pin – selecting the address of the slave device with which the microcontroller is to communicate;
- SCK (Serial Clock) – pin “D13”. – clock signal synchronising data transmission in both directions;
- MISO (Master Input Slave Output) – pin “D12”. – line sending information from slaves to the master
- MOSI (Master Output Slave Input) – pin “D11” – line sending information from master device to slave devices.
Arduino – communication pins – I2C interface
The Arduino is also equipped with an I2C bus, which allows communication between two components through a single PCB. For the UNO R3 board, communication over I2C is implemented using two pins:
- SDA (Serial Data) – pin for data transmission over the I2C bus;
- SCL (Serial Clock) – clock signal pin which synchronizes data transmission over I2C bus in both directions.
Each external device communicating with Arduino via I2C bus has its own unique address (e.g. 0x23 in hexadecimal notation), and up to 255 devices can be connected to the same bus simultaneously. On the Arduino UNO R3, the “SDA” and “SCL” pins are located on the analog pins “A4” and “A5” respectively.
Arduino – interrupt pins
In microcontrollers, including those such as the ATmega238P built into the Arduino, an external interrupt routine can be initiated. An external interrupt is a system interrupt that, under the influence of a disturbance outside the microcontroller, is initiated automatically from the mating device or manually from the user.
A typical, simplest example of use in Arduino, is counting the number of pulses and reading the frequency from an external rectangular signal source or terminating an interrupt routine to continue the normal flow of a program loaded into the microcontroller’s memory. On the Arduino UNO R3, the interrupt pins “INT0” and “INT1”, are available under the digital pins “D2” and “D3” respectively, and the activation and deactivation of each interrupt can be set individually in the program for the type of logic level change and includes both falling and rising edge triggering as well as low and high state triggering.
ICSP connector in Arduino UNO R3
ICSP (In-Circuit Serial Programming) is a 6-pin connector for connecting an external USB-ASP programmer. This solution was implemented for users who prefer “traditional” programming in C and Assembler languages, and want to save additional 5kB of microcontroller memory, which is occupied by Arduino bootloader (bootloader is necessary to run programs written with Arduino C/C++ syntax overlay). The ICSP pinouts have the following functions:
- SCK (Serial Clock) – clock signal that synchronizes data transmission between the microcontroller memory and the external computer;
- MISO (Master Input Slave Output) – line that sends information from slave devices to the master (external computer)
- MOSI (Master Output Slave Input) – line which sends information from master device (external computer) to slave devices.
- VCC – 5V auxiliary power line;
- GND – auxiliary power supply ground;
- RESET – microcontroller reset.
What else is worth knowing about the pinouts in Arduino?
The Arduino UNO R3 board is currently one of the most popular prototyping boards. The presented description of the leads relates to their basic functionality. Depending on the specifics of the target application, including specialized libraries supporting specific external hardware, their functional scope can be extended accordingly in a more advanced view.
When choosing an Arduino board for our project, we should be aware of its limitations and maximum capabilities, but also of the fact that by using the right tricks and additional hardware, the Arduino’s capabilities can be further expanded, e.g. by multiplexing the pins, our on-board pinout becomes much more versatile and allows us to connect e.g. more control buttons – a real treat for computer and music keyboard enthusiasts!
How useful was this post?
Click on a star to rate it!
Average rating 5 / 5. Vote count: 1
No votes so far! Be the first to rate this post.


