Table of Contents:
What the Arduino is?
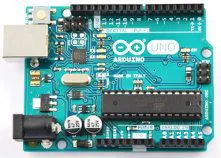
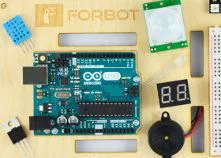
Arduino is one of the leading development boards, very often used for a wide range of tasks almost all over the world. It was created to popularize technical sciences and to make it easier for young programmers, electronics engineers and roboticists to access the right equipment. Despite their small size, the boards offer relatively large possibilities. For example, entire smart building systems are often built on their basis.
The key element contained in Arduino is a programmable microprocessor, while around it there are communication interfaces (e.g. USB connector), quartz resonator, passive elements like resistors and capacitors and most importantly a number of GPIO (general-purpose input/output) pins.
Using these you can for example easily connect LEDs and analog temperature sensor – the corresponding LEDs can turn on depending on the received data from the thermometer, according to the scheme of commands coming from the microprocessor. For such a system to work you need to properly program the microprocessor. For this purpose, it’s worth to use a dedicated programming environment, namely Arduino IDE.
The undeniable advantage of such a device is the simplicity of use and practically immediate possibility of programming it. Just connect the device via USB to a computer with installed software, select the connected minicomputer model and you can already program the device.
What Arduino programming language?
The language that is dedicated to Arduino can be simply called a derivative of C language. Practically speaking, it’s C language with some minor changes, which should make it easier for people not related to electronics to start learning. Arduino language is largely based on using libraries dedicated for the board. This makes it easier for both the programmer and the future code editor, due to readability.
Basic similarities to C
Even if you are already familiar with the C language, noticing the basic principles and similarities in the Arduino language can be helpful. The “;” character, or semicolon, is information to the compiler about a completed single instruction. Using curly brackets “{” and “}” allows you to restrict the beginning and end of a function body, conditional statement or loop. With tools such as comments that do not directly affect the code, you can easily make the code easier to understand for any person reading it (including yourself, in the future). Very often, commenting an instruction with one or two words is enough to make the code easier to understand. However, there is nothing wrong with leaving longer notes in the code. Single line commenting starts with “//” – until the end of the line you can write a comment, which will be marked with a lower contrast by the Arduino IDE and omitted by the compiler. If you need to write a longer statement with any number of lines, you can use the start bracket “/*” and end bracket “*/” (after any number of lines).
The main difference between the Arduino language and regular C is simply the specific libraries. You can easily implement these by using the “#include” command at the beginning of your program. For better program readability and simpler and faster software writing, you can use constant instruction elements, which just need to be called at the right moment. You can define them yourself in the program itself or they can be, for example, part of a certain library. This is, of course, about so-called “functions”. This is a tool whose presence, type and all the details are determined at the beginning of the program. Every function type except “void” returns some value. The “return” command returns at any point in the function the value specified after it. An example function notation is:
This means that the value 2 will be added to the variable “value” implemented earlier. Of course, many more examples and issues could be described, but this is a very broad field, and here we were going to present the basics illustrating how the whole thing works.
The Arduino is simplified C language
To sum up – when deciding to use Arduino boards, it’s a good idea to learn the basics of Arduino language using any reliable source. It’s not a difficult task – everything is based on simple and logical rules, with which you can easily create instructions understood by the compiler. If your goal is a deeper development in the field of programming, you can start right away by using the teaching materials for the C language, and only later broaden this knowledge by specializing to the Arduino language. This one is designed to require the least amount of programming involvement on the part of the electronics engineer.
How useful was this post?
Click on a star to rate it!
Average rating 4.5 / 5. Vote count: 8
No votes so far! Be the first to rate this post.


