Table of Contents:
The measure of the value of a tool is its utility. In the case of the popular Arduino platform, this simple rule has become the key to market success that encourages both the creators of the original board and hundreds of companies that design and sell modules, shields, add-on modules, kits, cases and other useful accessories for Arduino. The range of such products is growing day by day, and their creators literally outdo each other with new ideas, which helps to increase the popularity of the Arduino brand itself.
Is the idea most important?
It is hard to believe that the amazing story of Arduino, a device that conquered both the world of amateur electronics and that of rapid prototyping in industrial or scientific applications, began with a seemingly unimpressive project that an Italian student, Hernando Barragánfor, made for his own master’s thesis. A simple evaluation board, equipped with a small AVR microcontroller, power supply, reset, serial communication circuits and several cheap and popular connectors, made such a big splash that in exactly 10 years after the birth of this ancestor of Arduino, over seven hundred thousand copies of the board were sold.
The general concept of the project is very simple – Arduino can be considered just another one of the hundreds of evaluation boards for microcontrollers available on the market. One might think that another simple set with only one user-accessible LED, a reset button and the circuitry needed to provide power and communicate with the computer has little chance of success on the market. However, in the case of Arduino, unlike other modules of this type, we are not only dealing with the electronic system itself, but with a powerful programming platform. It offers both a perfectly prepared, simple, intuitive and stable software called Integrated Development Environment, and a large number of compatible libraries. Among the sample projects of Arduino IDE you can find both codes for simple programs, e.g. to operate LEDs or buttons, and quite complex applications that allow you to build a device that supports the Ethernet interface, or even… a web server based on a GSM module.
If we take into account that the vast resources of the Internet offer thousands of other, much more complicated and functional projects provided by the users of this board, we will soon realize that it is almost impossible to find a problem that has not been solved with Arduino yet. By the way – even people with no background in electronics or programming can use Arduino to build various devices or systems they need. Very often they buy the board for just one project, but it gets them going and they become more and more involved in DIY. In this way, many fans of motorization, astrophotography and home recording, who see that they are able to build interesting and useful devices themselves, join the worldwide group of electronics enthusiasts.
If you are just about to start your journey in this new area, it is worthwhile to focus on proven solutions. If you want to enter the world of electronics and microcontroller programming painlessly, easily and pleasantly, you should consider buying the official Arduino StarterKit K000007. In a small box you will get everything you need to learn the basics of electronics and code creation for microcontrollers by building, programming and commissioning simple gadgets. In addition to electronic components, simple mechanics and the necessary additional accessories, the set naturally also contains the main hero of our article – the Arduino Uno Rev3 module.
Arduino Uno Rev3 – the best support in learning electronics and programming
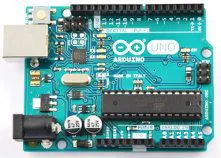
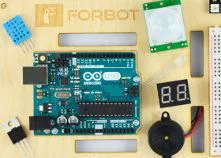
The Arduino Uno board has been the most popular module from the Italian manufacturer for years. Due to its relatively small dimensions – only 68.6 x 53.4 mm – the board is suitable both for experiments at home and for building Arduino-based devices at the destination where they are to be used. The design of the module is based on an 8-bit ATmega328P microcontroller, which represents the well-known and popular AVR family. The board provides the user with fourteen digital input-output (GPIO) lines and six inputs of an a 10-bit resolution analog-to-digital converter built into the structure of the microcontroller (it should be remembered that these lines – if configured accordingly – can also function as ordinary digital GPIO ports). You can also use a UART interface that supports the UART-USB converter, which is based on an additional ATmega16U2 microcontroller – thanks to this solution you can easily transfer data between Arduino and any computer program that supports a virtual serial port (e.g. PuTTY). If necessary, the interface can also be connected directly to another device equipped with a UART port – two permanently installed resistors protect against possible conflicts with the built-in converter.
The microcontroller used in the Arduino Uno Rev3 also offers 6 PWM channels supported by hardware timers and allowing, among other things, continuous control of the brightness of LEDs, the speed of a DC motor or… a model servo. The program memory (flash) has a capacity of 32kB, of which 31.5kB are available to the programmer (the remaining memory area is occupied by a pre-installed bootloader, which allows programming the microcontroller memory via USB without using an external ISP or JTAG programmer). The operating memory (Static RAM, or SRAM) has a size of 2 kB, and the non-volatile EEPROM memory, which allows to store rarely changed data (e.g. addresses, configuration data or calibration results), has a capacity of up to 1 kB. There are also four LEDs on the board: one to indicate the power supply status and the other two to indicate whether data is being sent from the computer to the Arduino or the other way round. The last, fourth diode is connected to the line called D13 in the Arduino nomenclature – it can be used in any way you like, for example to perform a simple board test in the form of a blinking software diode. The module also includes a RESET button with the necessary additional circuits. The board can be powered via the USB port, via the DC 2.1 / 5.5 mm socket or via the Vin pin available in one of the goldpins. In the latter two cases, the recommended voltage values are between 7 V and 12 V, although the board can be powered with voltages in the range of 6-20 V under certain conditions.
Arduino Starter Kit – what’s inside?
The official Arduino starter kit comes in an elegant cardboard box, which is about the size of an A4. After opening the box, the owner will see several smaller packages containing logically grouped elements of the kit. The largest of the packages contains a set of electronic components – both passive and solid-state. In addition to the set of required resistors with nominal values of 220 Ω, 560 Ω, 1 kΩ, 4.7 kΩ, 10 kΩ, 1 MΩ and 10 MΩ, you will also find some of the most frequently used capacitors: ceramic – 100 pF, foil – 100 nF and electrolytic aluminum – 100 µF, mounting potentiometers (3 pieces) with a value of 10 kΩ and connectors: 40-pin gold pin strip, a 9 V battery snap (type 6F22) and two male-to-male connecting cables (red and black). The set also includes low-power bipolar transistors (BC547 – 5 pieces), high power MOSFET transistors (IRF520) as well as silicon rectifier diodes (1N4007 – 5 pieces), two optocouplers, a popular integrated H-bridge (L293DNE) and a temperature sensor (TMP36). There are also optoelectronic elements: 5-millimeter LEDs in red, green, yellow (8 pieces each) and blue (3 pieces), super-bright white and tricolor RGB LEDs, and sensors: six small VT90N2 photoresistors. The Arduino Starter Kit also includes a mechanical tilt and shock sensor, 10 pushbuttons, as well as a piezo buzzer and three transparent gels in the primary colors (RGB). The next two separate boxes contain a monochrome alphanumeric LCD display with 2 x 16 characters with blue backlight and simple drives: a miniature model servo, packed together with a 6V DC motor.
The manufacturer also took care of the basic accessories, which you can start with without having to buy additional elements. The long, narrow box contains a USB cable that is compatible with the socket on the Arduino board, and in the middle part of the set is a box with a small breadboard (400 points) with a set of plugs of different lengths. The set also includes wooden elements for the construction of the assembly stand, cardboard elements with appropriate prints (needed for the assembly of some “mechatronic” projects) and a 172-page book – a guide that will guide you from the beginning to the end of the course.
Exemplary projects
The list of sample projects that can be done with the Arduino Starter Kit elements perfectly shows how many fun and fascinating gadgets can be built with just a handful of electronic components and a small microcontroller board. It is difficult to find a really “useful” device among the examples described in the book – the creators of the set adhered to the age-old principle that the easiest way to acquire knowledge is through play. And rightly so, because there will still be time for serious projects, and the satisfaction from making fully functional gadgets will be an excellent motivation to delve into the secrets of electronics and programming. Learning with Arduino Starter Kit will allow you to overcome the fear that some people feel when they want to start some electronics projects without any real technical knowledge. Many beginners fear that even building simple electronic devices requires knowledge of mathematics or physics at an academic level. Nothing could be more wrong – the examples in the manual are the best proof.
Our journey begins with the chapter Get to know your tools, where you will have the opportunity to learn about the basic electronic components and how they can be operated via the GPIO ports of the microcontroller. Subsequent projects – Spaceship interface, Love-O-Meter and Color Mixing Lamp – will allow you to learn the more advanced operation of LEDs while implementing other elements: push buttons, an analog temperature sensor and potentiometers. The Mood Cue project introduces the operation of model servos, where Light Theremin refers to one of the most fascinating electronic musical instruments in history, and allows you to create “cosmic” sounds controlled by the movement of your hand.
The chapter Keyboard Instrument shows how to build a very simple electronic instrument that can produce sounds of different pitches – although the number of keys is very limited, it is still an excellent introduction to building your own more complex music projects. The project entitled Digital Hourglass introduces you to the methods of time measurement using the millis() function in Arduino Core Development Library. In the chapter Motorized Pinwheel you will learn how to start a DC motor, and Zoetrope helps you bring to life the charm of simple, mechanical stroboscope animations from almost 200 years ago.
Properly programmed Arduino can also predict the future, which you will find out by building a “crystal ball” according to the chapter Crystal Ball. You will use the tilt and vibration sensor to build a simple but very effective electronic “lock” as described in the chapter Knock Lock. The Touchy-Feely Lamp project, on the other hand, introduces the construction of a touch-sensitive electronic lamp. You will certainly find many more interesting applications for the method of touch recognition shown in this project. The chapter Tweak the Arduino Logo introduces more advanced functions using the software for USB communication – here you will learn how to control your computer with your Arduino. The last of the projects described in the manual, called Hacking Buttons, shows how to control almost any external device using an Arduino-controlled optocoupler.
First steps in programming Arduino – how to deal with problems while learning
If you start the programming course with the official Arduino starter kit, you do not need any previous programming code experience. Perfectly described, simple and easily accessible examples included in the manual will allow you to start working immediately after opening the box and installing the Arduino IDE software on your computer. It should be remembered that the C++ language used to create program code for Arduino, like many other programming languages, is extremely sensitive to syntax errors. This means that a redundant character (such as an unnecessary space or period in a function name) or its absence (e.g. a missing semicolon at the end of a line of code) will cause the program to fail to compile or execute the project- you will receive an error message that describes the cause of the problem. In many cases, inexperienced programmers find it difficult not only to correct their own errors, but even to find and understand their cause. If you encounter such a situation while completing this course, first try to check carefully if the code is identical to the one given in the course book. If you cannot find the problem yourself, you can use a ready-made sketch (this is how program code files are called in Arduino IDE), which is available in the menu (File → Examples → 10. StarterKit_BasicKit). Assembling electronic circuits according to the sketches described in the manual also requires care – a great facilitation here is the possibility to use a contact plate, thanks to which it is not necessary to solder individual connections between the components of the circuit to be built.
Summary
In this article you learned about the characteristics of the Arduino Uno Rev3 board itself, as well as the composition of the official Arduino Starter Kit, which contains the module and all the electronic components and accessories needed to build the projects presented in the included manual. If you want to learn the basics of electronics and programming, we strongly recommend that you buy the official Arduino starter kit – it’s a great idea to start your adventure with electronic DIY. The game is worth the candle because electronics is not only a great hobby, but also a well-paid industry in modern technology world. Experienced designers of electronic systems and programmers of microcontrollers are highly valued specialists on the job market; they usually find their dream job without much trouble and can even choose between different job offers.
How useful was this post?
Click on a star to rate it!
Average rating 0 / 5. Vote count: 0
No votes so far! Be the first to rate this post.


