We all love photos whether they are used as decoration, a record of memories or a gift. 3D printing lithophane is a unique way to add real sophistication to all our images. A simple Google graphics search is all it takes to come across amazing maker projects using lithophane. Here are some methods on how to achieve the masterpiece of your dreams.
Lithophane – what is it?
Transforming photos into 3D objects gives them a new dimension literally and figuratively. Lithophanes are one simple way that can be used for such a DIY project. They furthermore reveal themselves as another creative way to use 3D printing technology, but what does it actually look like?
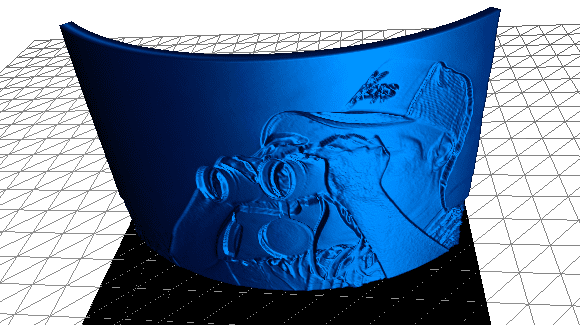
Lithophanes are basically embossed images generated by a 3D printer. At first glance you can’t see much in them, but just by shedding some light you can marvel at the details of the optical game. In simplest terms: light passes through thin surfaces while thicker ones block it. In this way, the details of the image are highlighted, and all this happens thanks to a natural phenomenon.
Lithophane – 3D model creation
Let’s get down to specifics. There are many tools for turning photos into lithophane models, although most of them work in a similar way. Our tool first “guesses” the main object in the photo and extrudes it, then gives it a border and delivers a final file familiar to 3D printing enthusiasts, for example in STL format.
One way to generate a lithophane model is to use Adobe Photoshop CC. However, if simplicity is desired, an online tool such as that offered by NestedCube can then be used.
Method 1. 3D Lithophane with Adobe Photoshop CC
Adobe added features to work with 3D elements in Photoshop quite some time ago. These options often help to convert 2D objects into 3D, which finds use when creating a lithophane. After applying the lithophane creation action in Adobe PS, we drag the .atn file into the Photoshop window to install it. Photoshop itself will go through the relevant sections of adding texture maps and create the 3D lithophane.
The process is based on Photoshop guessing the correct depth – this is done based on the difference in contrast, so those with higher (sharper) contrast tend to produce better results. A small note at the end – the process is quite time consuming and depending on the hardware specifications you are working on, it can simply take a while.
Method 2: 3D lithophane and STL file export
Now that we have a designed, finished lithophane model, we need to print it. Photoshop allows 3D printing, but many 3D printing enthusiasts and makers prefer to print using their favourite slicers. All you need to do is select the 3D printing settings, set the printer unit and a high level of detail. This process also uses a lot of memory and may even cause Adobe Photoshop to momentarily refuse to respond, but once it’s done we get the 3D lithophane in STL format.
Method 3. Lithophane as an online model
If Photoshop isn’t necessarily your thing or for some reason you don’t want to use it, All3DP provides an alternative method. Head over to the 3DP Rocks website, click on the “Images” tab and upload your image. When we return to the model tab our lithophane is almost ready. We can now choose different shapes of lithophane and adjust the settings until we are happy with the result. The last step is the “Download” button in the Model tab. The viewer will download the STL file and you can continue working.