Spis treści:
- 1 Functions and purpose of the MPPT controller
- 2 Building a prototype MPPT charge controller based on Arduino and its principle of functioning
- 3 MPPT charge controller – program code for measuring and stabilising the charge current at a constant level
- 4 MPPT charge controller – program code for measuring and stabilising the charge voltage at a constant level
- 5 MPPT charge controller – program code for measuring and stabilising the maximum power point
- 6 Arduino as MPPT controller – summary
When recharging batteries, it is necessary to ensure the correct current characteristics in order to prevent overcharging. This increases the life of the battery within the solar panel – battery system. When the critical voltage is exceeded, the regulator disconnects the energy source, and the same happens when the battery is fully charged. This paper presents an example prototype of an Arduino-based solar battery charger that operates on the principle of maximum power point tracking (MPPT).
Functions and purpose of the MPPT controller
The MPPT controller is responsible for charging the battery in different modes, protects the battery from damage due to overcharging and also protects the solar panel from overcurrent. Other functions of the MPPT controller are battery overload protection (undervoltage lockout) and charge level tracking. Today’s modern batteries, such as lead-gel batteries, require a 3-stage charge.
When the battery is deeply discharged, bulk charging is initiated, i.e. with a current corresponding to the battery capacity. In this mode, the battery is charged with a constant current up to about 80% of its total capacity. When a certain voltage threshold is reached, the controller switches the charging process to absorption mode. In this mode, the battery is charged with a constant voltage, but with an increasingly lower current. When the absorption phase is complete, the charge controller switches to voltage hold mode and charges the battery with a current that is 1% of the battery capacity divided by one hour, e.g. for a 2Ah battery this would be 2mA.
In our prototype, we will use a battery with a nominal voltage of 12V and a capacity of 2Ah, which can be charged with a maximum voltage of 14.4V and a current of 2A.
Building a prototype MPPT charge controller based on Arduino and its principle of functioning
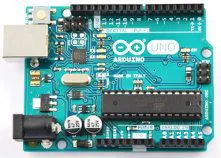
Our MPPT charge controller must be able to read the output and input voltages and currents, and perform the necessary calculations to enable the necessary optimisation of the charging process. For this purpose, we will use the dedicated ACS712 module as a current sensor. The voltage boost converter, on the other hand, will be controlled using a PWM signal source from the Arduino and a MOSFET transistor or electromagnetic relay, which will switch the load on and off. To read the charging parameters, we will use a 4×20 LCD display (four lines of twenty characters each). You will also need an inverter to step down the voltage to 5V to power the Arduino board.
MPPT charge controller – program code for measuring and stabilising the charge current at a constant level
The following program code is intended to control the limitation of the charging current to 1A. Therefore, if too high a charging voltage is connected, the MPPT controller is designed to limit the charging current to a software-set value. This is done by appropriately decreasing and increasing the fill factor of the PWM waveform controlling the gate of the MOSFET transistor to relatively stabilise the charging current to 1A.
Program code:
//The program controls the stabilisation of the battery charging current by the MPPT charging controller #include // Wire.h library initiation #include //LCD library initiation LiquidCrystal_I2C lcd(0x27,20,4); //Addressing the LCD to the I2C bus //Declaration of constants #define LCD_refresh_rate 1000 //LCD display illumination every 1s //Declaration of inputs #define solar_current_in A0 //curret measurement - analog input A0 //Declaration of outputs #define PWM_out 10 #define load_enable 2 //Declaration of variables int pwm_value = 0; //the initial fill factor of the MOSFET control signal float solar_current = 0; //initial charging current float current_factor = 0.185; //Default value declared by the manufacturer of the ACS712 sensor unsigned int before_millis = 0; unsigned int now_millis = 0; void setup(){ pinMode(solar_current_in,INPUT); //charging current measuring pin as input pinMode(PWM_out,OUTPUT); //PWM charging control pin as output digitalWrite(PWM_out,LOW); //PWM pin set low - MOSFET does not conduct TCCR1B = TCCR1B & B11111000 | B00000001; //timer 1 set to 31372.55Hz frequency Serial.begin(9600); //enable serial transmission lcd.init(); //activation of LCD display lcd.backlight(); //switching on the LCD display backlight before_millis = millis; //LCD display time resolution } void loop(){ solar_current = get_solar_current(10); now_millis = millis(); if(now_millis - before_millis > LCD_refresh_rate) { before_millis = now_millis; //lcd.clear(); //cleaning the contents of the LCD display lcd.setCursor(0,0); //cursor positioning lcd.print(solar_current,2); //displaying the current at the output of the solar panel lcd.print("A"); //current in Amperes } //Stabilisation of the constant charging current if(solar_current > 1.0) //for charging currents greater than 1.0A { pwm_value--; pwm_value = constrain(pwm_value,0,254); //PWM modulation range from 0% to 99% } else { pwm_value++; pwm_value = constrain(pwm_value,0,254); } analogWrite(PWM_out,pwm_value); //value of the fill factor //measuring the number of samples float get_solar_current(int n_samples) { float Sensor_voltage; //sensor voltage float current =0; for(int i=0; i < n_samples; i++) { Sensor_voltage = analogRead(solar_current_in) * (5.0 / 1023.0); current = current + (Sensor_voltage-2.5)/current_factor; } //sensor voltage reading } current = current/n_samples; //calculation of the number of current samples return(current); }
MPPT charge controller – program code for measuring and stabilising the charge voltage at a constant level
The next part of the program code is responsible for maintaining a voltage with a constant charging value. In the case of our project, this will be a value of 12V. The code considers all three phases of the battery charging process.
Program code:
//The program controls the stabilisation of the battery charging voltage by the MPPT charging controller #include // Wire.h library initiation #include // LCD library initiation LiquidCrystal_I2C lcd(0x27,20,4); //Addressing the LCD to the I2C bus //Declaration of inputs #define battery_voltage_in A2 //Declaration of outputs #define PWM_out 10 #define load_enable 2 //Declaration of variables float bat_voltage = 0; //initial battery charging voltage int pwm_value = 0; //initial signal fill factor of MOSFET unsigned int before_millis = 0; unsigned int now_millis = 0; #define LCD_refresh_rate 1000 //LCD display refreshing every 1s void setup(){ pinMode(battery_voltage_in,INPUT); //pin for measuring the battery charging voltage as an input pinMode(PWM_out,OUTPUT); //PWM pin as output digitalWrite(PWM_out,LOW); //PWM pin flipped to low state TCCR1B = TCCR1B & B11111000 | B00000001; //timer 1 set to 31372.55 Hz Serial.begin(9600); //enabling serial transmission lcd.init(); //Activation of LCD display lcd.backlight(); //Switching on the LCD display backlight before_millis = millis; } void loop(){ bat_voltage = get_battery_voltage(10); //battery voltage based on the PWM signal fill factor at pin 10 now_millis = millis(); if(now_millis - before_millis > LCD_refresh_rate) { before_millis = now_millis; //lcd.clear(); //cleaning the contents of the LCD display lcd.setCursor(0,0); //resetting the cursor position lcd.print(bat_voltage,2); //battery voltage lcd.print("V"); //display of result in Volts } //Charge voltage stabilisation control if(bat_voltage > 12.0){ //Checking the battery over voltage condition pwm_value++; pwm_value = constrain(pwm_value,0,254); } else { pwm_value--; pwm_value = constrain(pwm_value,0,254); } analogWrite(PWM_out,pwm_value); //PWM output control } //Measurement and probing of battery voltage values float get_battery_voltage(int n_samples) { float voltage = 0; for(int i=0; i < n_samples; i++) { voltage += (analogRead(battery_voltage_in) * (5.0 / 1023.0) * 7.85); //voltage measurement } voltage = voltage/n_samples; //calculation of the number of voltage samples return(voltage); }
MPPT charge controller – program code for measuring and stabilising the maximum power point
The last part of the program code for the MPPT controller, is responsible for calculating and stabilising the maximum power point at which the most optimal conditions for charging the battery occur. The program performs comparative measurements of currents and voltages and switches between charging modes when certain conditions are met.
Program code:
//The programme controls the stabilisation of the maximum power point of the MPPT charge controller and switches between charging modes #include //Initiation of Wire.h library #include //LCD library initiation LiquidCrystal_I2C lcd(0x27,20,4); //Addressing the LCD to the I2C bus //Initiation of variables uint8_t Battery[8] = {0x0E, 0x1B, 0x11, 0x11, 0x1F, 0x1F, 0x1F, 0x1F}; uint8_t Panel[8] = {0x1F, 0x15, 0x1F, 0x15, 0x1F, 0x15, 0x1F, 0x00}; uint8_t Pwm[8] = {0x1D, 0x15, 0x15, 0x15, 0x15,0x15, 0x15, 0x17}; uint8_t Flash[8] = {0x01, 0x02, 0x04, 0x1F, 0x1F, 0x02, 0x04, 0x08}; //Initiation of constants #define bulk_voltage_max 14.5 //max. voltage in bulk mode #define bulk_voltage_min 13 //min. voltage in bulk mode #define absorption_voltage 14.7 //voltage in absorption mode #define float_voltage_max 13 //max. voltage in back-up mode #define battery_min_voltage 10 //min. battery voltage #define solar_min_voltage 19 //min. solar panel voltage #define charging_current 2.0 //min. charging current #define absorption_max_current 2.0 //max. absorption current #define absorption_min_current 0.1 //min. absorption current #define float_voltage_min 13.2 //min. voltage in back-up mode #define float_voltage 13.4 //set voltage in back-up mode #define float_max_current 0.12 //max. voltage in back-up mode #define LCD_refresh_rate 1000 //LCD display refreshing every 1s byte BULK = 0; //assignment of numbers to individual charging modes byte ABSORPTION = 1; byte FLOAT = 2; byte mode = 0; //by default, we start loading from bulk mode //configuration of analogue inputs for measurements #define solar_voltage_in A1 //solar panel voltage - pin A1 #define solar_current_in A0 //solar panel output current - pin A0 #define battery_voltage_in A2 //battery voltage - pin A2 //output config. #define PWM_out 10 //PWM output - pin D10 #define load_enable 2 //starting charging - pin D2 //initiation of variables float bat_voltage = 0; //battery voltage int pwm_value = 0; //fill factor float solar_current = 0; //charing current float current_factor = 0.185; //current constant for the ACS712 5A sensor float solar_voltage = 0; //solar panel voltage float solar_power = 0; //solar panel power String load_status = "OFF"; //loading status turned off int pwm_percentage = 0; //Percentage of fill ratio unsigned int before_millis = 0; unsigned int now_millis = 0; String mode_str = "BULK"; void setup(){ pinMode(solar_voltage_in,INPUT); //pin configuration as input pinMode(solar_current_in,INPUT); pinMode(battery_voltage_in,INPUT); pinMode(PWM_out,OUTPUT); //PWM pin configuration as output digitalWrite(PWM_out,LOW); //PWM pin set low - MOSFET does not conduct pinMode(load_enable,OUTPUT); //charge switch output digitalWrite(load_enable,LOW); //switching off the charging (relay) TCCR1B = TCCR1B & B11111000 | B00000001; //timer 1 set to 31372.55Hz Serial.begin(9600); //enable serial transmission lcd.init(); //switching on the LCD display lcd.backlight(); //switching on the LCD display backlight lcd.createChar(0, Battery); lcd.createChar(1, Panel); lcd.createChar(2, Pwm); lcd.createChar(3, Flash); before_millis = millis; //LCD display time resolution } void loop(){ solar_voltage = get_solar_voltage(15); //solar panel voltage bat_voltage = get_battery_voltage(15); //battery voltage solar_current = get_solar_current(15); //solar panel current solar_power = bat_voltage * solar_current; //solar panel power pwm_percentage = map(pwm_value,0,255,0,100); //display of measurements on LCD screen now_millis = millis(); if(now_millis - before_millis > LCD_refresh_rate) { before_millis = now_millis; lcd.clear(); lcd.setCursor(0,0); //cursor positioned on column 0 row 0 lcd.write(1); //writing "1" on the LCD - measurement for the solar panel. lcd.print(" "); //space lcd.print(solar_voltage,2); //solar panel voltage lcd.print("V"); //voltage in Volts lcd.print(" "); //space (4 times) lcd.write(0); //writing "0" on LCD - measurement for battery lcd.print(" "); //space lcd.print(bat_voltage,2); //battery voltage lcd.print("V"); //voltage in Volts lcd.setCursor(0,1); //cursor positioned on column 0 row 1 lcd.print(" "); //space (4 times) lcd.print(solar_current,2); //measuring the current for the solar panel. lcd.print("A"); //current in Amperes lcd.print(" LOAD "); //load lcd.print(load_status); //load status lcd.setCursor(0,2); //cursor positioned on column 0 row 2 lcd.print(" "); //two times space lcd.print(solar_power,2); //power from solar panel lcd.print("W"); //power in Watts lcd.print(" PWM "); //displaying "PWM" lcd.print(pwm_percentage); //Percentage of fill ratio lcd.print("%"); //percentage sign display lcd.setCursor(0,3); //cursor positioned on column 0 row 3 lcd.print(mode_str); } if(bat_voltage < battery_min_voltage){ digitalWrite(load_enable,LOW); //below the minimum voltage the load is switched off load_status = "OFF"; //load status - off } else{ digitalWrite(load_enable,HIGH); //when the battery is charged, we switch on the load load_status = "ON"; //load status - on } //Battery back-up mode at the end of charging //For battery voltages below the backup voltage, activate DC charging in BULK mode if(mode == FLOAT){ if(bat_voltage < float_voltage_min){ mode = BULK; //bulk mode set on mode_str = "BULK"; } else{ if(solar_current > float_max_current){ //when the solar panel current exceeds the holding current, switch to DC charging in BULK mode mode = BULK; //switching on bulk mode mode_str = "BULK"; }//End if > else{ if(bat_voltage > float_voltage){ pwm_value--; pwm_value = constrain(pwm_value,0,254); //for a battery voltage higher than the backup voltage, reduce the discharge by 1 } else { pwm_value++; pwm_value = constrain(pwm_value,0,254); //for a battery voltage lower than the backup voltage, increase the filling factor by 1 } }//End else > float_max_current //otherwise increase the charging current in the voltage holding state analogWrite(PWM_out,pwm_value); } }//END of mode == FLOAT //deactivation of voltage support mode //Mode change from bulk to absorption else{ if(bat_voltage < bulk_voltage_min){ mode = BULK; mode_str = "BULK"; //activation of bulk charging mode } else if(bat_voltage > bulk_voltage_max){ mode_str = "ABSORPTION"; mode = ABSORPTION; //activation of the absorption charging mode } //Activation of bulk mode if(mode == BULK){ if(solar_current > charging_current){ //if the current of the solar panel is higher than the charging current, reduce the boost by 1 pwm_value--; pwm_value = constrain(pwm_value,0,254); } else { ////if the current of the solar panel. less than the charging current, increase the filling ratio by 1 pwm_value++; pwm_value = constrain(pwm_value,0,254); } analogWrite(PWM_out,pwm_value); }//End of mode == BULK //absorbtion mode if(mode == ABSORPTION){ if(solar_current > absorption_max_current){ pwm_value--; pwm_value = constrain(pwm_value,0,254); //if the solar panel current exceeds the maximum absorption current, reduce the filling factor by 1 }//End if > absorption_max_current ////if the solar panel current exceeds the maximum absorption current, reduce the filling factor by 1 else{ if(bat_voltage > absorption_voltage){ pwm_value--; pwm_value = constrain(pwm_value,0,254); //if the battery voltage exceeds the absorption voltage, reduce the filling ratio by 1 upwards } else { pwm_value++; pwm_value = constrain(pwm_value,0,254); // //if the battery voltage is lower than the absorption voltage, increase the discharge by 1 upwards } if(solar_current < absorption_min_current){ //if the solar panel current is less than the minimum absorption charging current mode = FLOAT; //activation of voltage support modes mode_str = "FLOAT"; } }//End else > absorption_max_current //if the current of the solar panel exceeds the maximum absorption charging current analogWrite(PWM_out,pwm_value); }// End of mode == absorption_max_current //deactivation of voltage support mode }//END of else mode == FLOAT //Serial.println(bat_voltage); //battery voltage }//End void loop //Measurement of the solar panel voltage by voltage probing float get_solar_voltage(int n_samples) { float voltage = 0; for(int i=0; i < n_samples; i++) { voltage += (analogRead(solar_voltage_in) * (5.0 / 1023.0) * 8.0); //calculation of the solar panel voltage for ADC } voltage = voltage/n_samples; if(voltage < 0){voltage = 0;} return(voltage); } //Battery voltage measurement by voltage probing float get_battery_voltage(int n_samples) { float voltage = 0; for(int i=0; i < n_samples; i++) { voltage += (analogRead(battery_voltage_in) * (5.0 / 1023.0) * 7.85); //calculation of the voltage for an ADC } voltage = voltage/n_samples; if(voltage < 0){voltage = 0;} return(voltage); } //Panel current measurement by voltage probing float get_solar_current(int n_samples) { float Sensor_voltage; float current =0; for(int i=0; i < n_samples; i++) { Sensor_voltage = analogRead(solar_current_in) * (5.0 / 1023.0); //calculation of the voltage drop for an ADC current = current + (Sensor_voltage-2.5)/current_factor; //calculation of current from voltage drop } current = current/n_samples; if(current < 0){current = 0;} return(current); }
Arduino as MPPT controller – summary
The MPPT charge controller concept presented here illustrates a simple prototype that, while performing sufficiently, still has some limitations due to the low efficiency of the photovoltaic panels, among other things. However, as solar panel technology improves, the efficiency of the panels will increase and, combined with the use of the MPPT algorithm, photovoltaics will become even more economically advantageous. Over time, such technology will perform even better in powering loads with increased electricity consumption.
How useful was this post?
Click on a star to rate it!
Average rating 4.4 / 5. Vote count: 5
No votes so far! Be the first to rate this post.