Table of Contents:
- 1 Getting started with Arduino – a guide for DIY enthusiasts of early school age
- 2 Arduino, or where to start learning to do programming
- 3 What is Arduino?
- 4 How does the Arduino board work?
- 5 What will we need?
- 6 Auxiliary workshop tools
- 7 Arduino – pinouts: inputs and outputs
- 8 Before we get started…
- 9 Arduino for kids – an example project to start – concept
- 10 Example program code for Arduino
- 11 First of all – safety!
Getting started with Arduino – a guide for DIY enthusiasts of early school age
Arduino platform is an inconspicuous, small board that offers great possibilities. It allows the realization of various projects, regardless of skills or age of the user. This article is an introduction to the world of Arduino, especially for those who are interested in technology from their early years.
Arduino, or where to start learning to do programming
A person can enter the world of various interests at practically every stage of their earthly life. This also applies to early childhood, when the first answers to the question “What do I want to be in the future? “This also applies to early childhood, when the first answers to the question “What do I want to be in the future? This is usually related to the child’s fascination with a particular profession or field of interest. When noticing such tendencies in children, it is worth helping them to enter this world step by step, by using the appropriate tools for this purpose.

Thus, if children have technical interests, then, given the increasing involvement of electronics and computer science in many areas of science and technology, it is a very good idea to show them Arduino – a tool used by people with widely varying technical skills – both beginners with no prior practical experience and professional designers who have cut their teeth on writing source code and designing electronic circuits.
What is Arduino?

In general, Arduino is an ecosystem that includes hardware and software distributed under an open-source license. The hardware layer consists of base boards with microcontrollers (programmable electronic circuits) and external hardware in the form of numerous accessories and extensions. The software layer is the integrated development environment – Arduino IDE, where we create the program code, often with the use of ready-made auxiliary libraries to support a specific hardware extension, such as LCD display or temperature sensor. The popularity and wide range of Arduino applications is proven by a large community of users on the Internet, as well as a constantly growing repository of projects, which can be downloaded for free, modified and shared with other users.
How does the Arduino board work?
In simplest words, the principle of Arduino ecosystem is that we first create program code in Arduino IDE environment, and then upload it to microcontroller’s memory, placed on the board. Now, every time the board is powered on, the program code uploaded to the memory will be executed. Interaction of the program code with the physical world will also depend on the elements of the external hardware, connected to the board pins. These elements can be for example buttons and LED diodes. In this way, we can create a program that will e.g. cause the LED to light up when the button is pressed for a short time, and turn off when the button is pressed again. We can also do some ‘automation’, e.g. replacing the button with a light sensor, which, when the room is sufficiently dark, will trigger the LED to light up and turn off, when the room is sufficiently bright, i.e. according to a threshold value declared earlier in the program code.
What will we need?
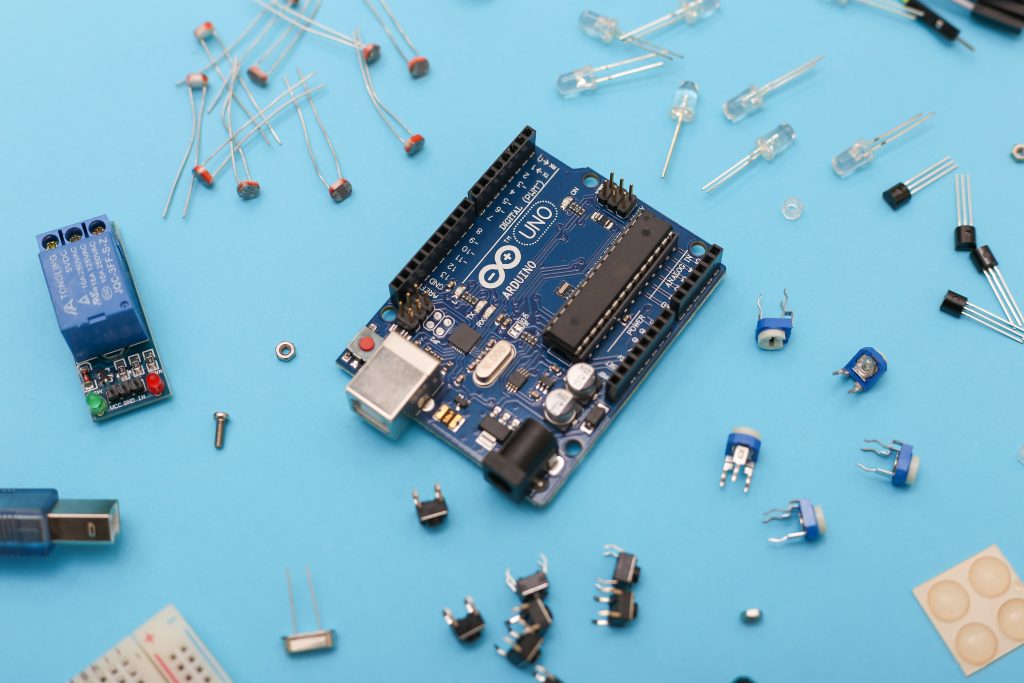
Despite appearances, to create amazing things based on Arduino already at the age of several years, you won’t need many things. Apart from good intentions, you will definitely need an Arduino board – the most popular choice is the Arduino UNO R3 model, which is often cloned by many other manufacturers. However, you don’t necessarily have to buy an original Arduino – you can also buy an Arduino compatible board at a lower price. To be sure that you are buying a proven product, it is worth checking if it is available on the original manufacturer’s website and has a declared compatibility with the original Arduino.
When implementing the first, simplest projects, but also those with a higher level of sophistication, additional elements will definitely come in handy, in the form of a contact board, connection wires, LEDs, resistors, potentiometers, transistors, buttons, and sensors. To run Arduino board, we also need to supply it with voltage via USB port (when communicating with computer) or power supply unit, which supplies DC voltage from 7V – 12V (when using Arduino board outside the computer, e.g. in final project).

An indispensable element for playing with Arduino is a computer – it’s where we’ll create the program code for our project. Arduino and compatible clones can work with both PC Windows computers and Apple Macintosh computers with MacOS operating system.
Auxiliary workshop tools
Most of the small projects based on Arduino boards, the youngest users can make without using any workshop tools, just stopping at a contact board and connection wires. However, if your kids want to be a bit more creative, then it’s a good idea to present them with a few support tools.
As they develop an interest in electronics, a flask soldering iron will certainly come in handy, which is not a very expensive tool, although you should remember to supervise children when using it, due to the risk of burns if they handle it carelessly. The soldering iron proves to be a very useful tool, especially when creating more elaborate projects that go beyond the scope of a standard circuit board. A tripod with clips (the so-called ‘third hand’) for holding PCBs is also a helpful addition. Side cutters come in handy during soldering, with which we can cut wires and excess leadings of elements.
If during the assembly of the prototype it turned out that there is not enough space on the prototype PCB and the rest of the elements must be soldered “in the air”, then we can easily solve this problem using a glue gun. Hot glue allows you to stabilise the components without the risk of melting the soldering points, but you still need to be very careful when using the glue gun – the nozzle does not heat up to such a high temperature as the soldering iron tip, but it is still hot enough that touching it can cause burns.
Arduino – pinouts: inputs and outputs
The pins located along the longer sides of the Arduino board include inputs and outputs. Through these pins, external devices and components communicate with the microcontroller on this board. Input pins are used to send information to Arduino, and through output pins, Arduino sends information to external devices, which are connected to this board. Examples of input components that can work with the Arduino are a temperature sensor, a button, a light sensor, a heart rate sensor and a soil moisture sensor.
All these elements, depending on their design, react to specific physical phenomena, which they convert into electrical signals sent to the Arduino and processed accordingly according to the program code. In turn, through the Arduino outputs, the microcontroller located on the board sends information to external modules as a result of the event. Examples of such output components that are commonly used by children starting to learn with Arduino are LEDs, servos, relays, and buzzers. All of these and similar components, perform actions according to their intended purpose, in response to commands issued from the Arduino board.
Before we get started…
…first of all, it is useful to give your children a theoretical introduction, which explains all the practical issues in an accessible way. For this reason, you should give your children information such as the principle of the Arduino and the relationship between inputs and outputs, as well as developing a plan for their first project. It is crucial to discuss the different stages of the project. We fit each component and then look at the design concept. Then, once this is done, all that remains is to turn what we have just done and talked about into program code.
Once the programme code is written, there is a possibility of encountering minor problems, but if we start implementing the steps of our project in a step-by-step manner, then everything will go easier.
Arduino for kids – an example project to start – concept
When you start your Arduino adventure, it’s a good idea to start with simple projects, that show you how the program code interacts with external hardware. A good project to start with is a model of a miniature bedside lamp, which is switched on and off automatically, according to the level of darkness in the room. The external components in this project are an LED (symbolising the bedside lamp) and a light sensor (e.g. a photoresistor with a tuning potentiometer).
An example concept based on which to create the program code for this project is as follows: The sensor checks the room illumination every 60 seconds. If the room illumination is below a preset threshold, the light should be switched on and off when the illumination reaches or exceeds the preset threshold.
Based on this, children can quickly understand the principle of Arduino inputs and outputs and create increasingly sophisticated projects, such as a plant waterer triggered by a humidity sensor. New hardware challenges also mean even more advanced program code. That’s why it’s so important to master the basic instructions included in the program code in the Arduino IDE environment.
Example program code for Arduino
The part that can cause the most difficulty with a project can be writing the program code, but this is also the part where you can learn a lot – especially about mistakes and how not to make them. One of the simplest program codes is the program that controls the blinking of the LED that comes pre-built on the Arduino board.
Program code:
					//LED flashing programme
void setup() //initial program setup
{
 pinMode(LED_BUILTIN, OUTPUT); //pin LED_BUILTIN as output
}
void loop() //program loop
{
 digitalWrite(LED_BUILTIN, HIGH); //turning LED oon
 delay(1000);                     //wiat for 1s
 digitalWrite(LED_BUILTIN, LOW);  //wturning LED off
 delay(1000);                     //wait for 1s
}
The above program code is divided into two sections – “Setup” and “Loop”. The content of “Setup” section is executed one by one, each time the Arduino is powered on or reset. Whereas the “Loop” section is repeated and executed in a loop all the time the Arduino board is powered up. More advanced programs include, among other things, conditions and libraries that support external modules, such as the LCD display.
First of all – safety!
Learning to prototype electronic devices and programming based on the Arduino platform is a very good way to introduce your child to the world of technology. If things don’t work out the first time, don’t be discouraged, just patiently go through the creative process again until you get the intended result. However, the most important thing in all of this is to be safe – while playing with Arduino, don’t leave your kids unsupervised, because of the possibility of getting burned by a hot soldering iron or glue gun, as well as the possibility of swallowing small parts.

Therefore, before we start with our children to carry out practical tasks using Arduino, it is necessary to familiarize children with the organization of safe work. While playing, let’s also remember to check if all elements are connected properly, starting with the board’s power supply. Incorrectly connected power supply may even cause permanent damage to the Arduino board and computer.