Table of Contents:
Have you ever wondered what you can do with a small device that fits in the palm of your hand? Raspberry Pi 2 opens the door to the world of creative programming and design. Thanks to this article, you will discover the diverse uses of this minicomputer and how you can use it to realize your own ideas. Interested? I invite you to read!
Introduction to the Raspberry Pi 2
Raspberry Pi 2 is a miniaturized computer that deserves your attention. Developed by the Raspberry Pi Foundation, the Raspberry Pi 2 is not only a minicomputer with a small size, but also a powerful tool with infinite potential.
The Raspberry Pi 2, like its predecessors, is designed to promote the learning of computer science, but its applications extend far beyond this single purpose. With its ability to support operating systems such as Raspbian, Pidora and Arch Linux, the Raspberry Pi 2 can be used for a wide variety of purposes.
For example, the Raspberry Pi 2 can serve as a home server, a media management system, a robot, a security system or even as a platform for software development. Such versatility makes up the uniqueness of the Raspberry Pi 2.
The features that distinguish this minicomputer are mi. in:
- powerful and efficient processors;
- The ability to support different operating systems;
- The ability to program in different languages;
- Support for various communication technologies.
To grasp the full capabilities of the Raspberry Pi 2, it is worth delving into the subject and learning more about this type of device. This knowledge can be extremely useful for those interested in technology, as well as for those looking for a way to automate their home or workplace.
Raspberry Pi 2 - technical specifications
Let’s start by examining the Raspberry Pi 2‘s specifications, which highlight its potential.
The main specifications of this minicomputer include a quad-core ARM Cortex-A7 processor clocked at 900 MHz and 1 GB of RAM. These components guarantee impressive performance, allowing the operating system and demanding applications to run smoothly.
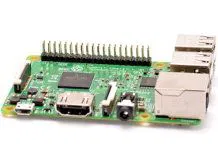
The Raspberry Pi 2’s remarkable versatility is provided by the available I/O ports. This minicomputer is equipped with 4 USB ports, an HDMI port, a microSD card slot, an Ethernet port and a 3.5mm audio jack. This allows the Raspberry Pi 2 to be connected to many peripherals, increasing its range of applications.
This further expands the hardware capabilities among other minicomputers. A review of the Raspberry Pi 2’s specifications shows what impressive capabilities this small but powerful computer offers us.
Examples of Raspberry Pi 2 applications in a variety of projects
The applications of the Raspberry Pi 2 are extremely diverse, thanks to its unique hardware configuration and versatility. A practical use of this minicomputer is in education, where the Raspberry Pi 2 is readily used in classrooms to teach programming, operating systems or even the basics of electronics. Its low cost and open source software provide an affordable educational platform.
Raspberry Pi 2 is also used in the area of home servers. It can be configured as a file server, media server or game server. Hobby projects that use the Raspberry Pi 2 are equally popular. From home automation, to building drones, to creating custom weather stations. With the versatility of the Raspberry Pi 2, the possibilities are almost endless.
Here are some example applications:
- smart home management center;
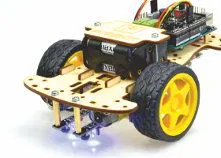
- building homemade robots;
- Creating ambient monitoring devices;
- Designing your own games and applications.
So we can see that the applications of the Raspberry Pi 2 are very diverse, and its potential surprises both beginners and experienced users. This is due to the possibilities offered by this versatile minicomputer.
Raspberry Pi 2 - comparison with other models
Comparing the Raspberry Pi 2 with other models in the family Raspberry Pi, several important differences can be noted. Since the release of the original Raspberry Pi, the Raspberry Pi Foundation has continually developed its products, delivering new models to the market. Each model has specific features that are refined and expanded in subsequent versions. A practical comparison between the Raspberry Pi 2 and other models allows you to better understand the unique features of each.
Raspberry Pi Zero offers a 1 GHz processor and 512 MB RAM, as well as mini HDMI and USB ports.
Raspberry Pi 3, which came after the Raspberry Pi 2, has a more powerful 1.2 GHz Quad-Core ARM Cortex-A53 processor and 1 GB of RAM. Compared to the Model 2, it also offers Wi-Fi and Bluetooth integrated on board.
Raspberry Pi 4 is another family member with a powerful processor, as much as 8 GB of RAM and two HDMI ports.
The following list shows a comparison of key features:
- Raspberry Pi Zero: 1 GHz, 512 MB RAM, mini HDMI, USB ports;
- Raspberry Pi 2: 900 MHz Quad-Core ARM Cortex-A7, 1 GB RAM;
- Raspberry Pi 3: 1.2 GHz Quad-Core ARM Cortex-A53, 1 GB RAM, Wi-Fi, Bluetooth;
- Raspberry Pi 4: higher performance, up to 8 GB RAM, two HDMI ports.
An analysis of the differences between the Raspberry Pi 2 and other models in the Raspberry Pi family shows the evolution and improvements made by the manufacturer. Nevertheless, the Raspberry Pi 2 is still an excellent choice for many projects, especially for those who are new to programming and electronics.
Installation of the operating system - the first step
The first necessary step that will allow you to take full advantage of the Raspberry Pi 2 is to install the operating system. You can test various systems on this minicomputer, but the most popular are Raspbian, Pidora and Arch Linux. Each has its own specific features, tailored to the needs of the user. Thanks to its flexibility, the Raspberry Pi 2 allows both the installation of simple operating systems and advanced Linux distributions.
The installation process is simple and intuitive, but it does require careful adherence to the instructions. First, you need a microSD card that will serve as a hard drive for the Raspberry Pi 2. Then, using a computer with Internet access, you must download the operating system image.
After downloading the image, you need to save it to a microSD card using a special program such as Etcher. After saving the system on the card, simply insert the card into the Raspberry Pi 2, connect the device to power and monitor, and the installation of the operating system will start automatically.
The key to success is patience and strict adherence to instructions. Remember that any installation involves risks, so always make sure you follow the steps as recommended.
Community support and learning materials
Part of the success of the Raspberry Pi 2 is its community support, which allows users to learn and exchange ideas. There are a huge number of resources on the web to help you get the most out of it. Many enthusiasts share their source codes, tutorials or finished projects, making it much easier to start the adventure with Raspberry Pi 2.
The Raspberry Pi community offers support in various forums, groups on social networks and dedicated sites, as well as through various webinars and online training courses. For those eager to learn, there are also a number of courses that take you step-by-step through the programming and operation of the Raspberry Pi 2. Without a doubt, with the support of the community, the process of learning and exploring the capabilities of the Raspberry Pi 2 is much simpler and more rewarding.
How useful was this post?
Click on a star to rate it!
Average rating 4.3 / 5. Vote count: 3
No votes so far! Be the first to rate this post.


