Table of Contents:
- 1 What are pinout expanders for microcontrollers?
- 2 Other uses of lead expanders
- 3 Mux Shield II - lead expander for Arduino
- 4 Technical parameters of Mux Shield II
- 5 Additional information about Mux Shield II
- 6 Qwiic Mux Breakout module compatible with Arduino
- 7 Application of SparkFun Qwiic Mux Breakout Module
- 8 How to connect a lead expander to an Arduino microcontroller?
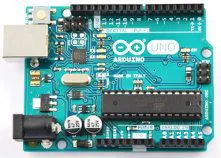
Lead expanders for Arduino are electronic modules that, when connected to a microcontroller, increase the number of input-output (I/O) pins.
What are pinout expanders for microcontrollers?
Lead expanders, compatible with microcontrollers such as Arduino, are popular electronic modules whose main purpose is to increase the number of available input-output (I/O) pins. Connecting an expander makes it quick and easy to connect different types of devices or external accessories.
Expanders are particularly useful in projects that require more inputs and outputs than those available on the board to function properly Arduino. Extensions of this type are used in home automation and robotics projects.
Individual lead expanders differ in functionality, pin count, application, compatibility and communication interfaces. Selected models, for example, use serial communications such as 12C and SPI. In addition, selected expanders allow analog-to-digital conversion.
Other uses of lead expanders
What else are they used for pinout expanders? They are perfect for educational projects (including controlling robots). In addition, they are used in measuring stations and systems that would be impossible to operate with a microcontroller alone. The key advantages of lead expanders are their flexibility, scalability and easy connection to the host device.
In addition, thanks to the lead expander, you can quickly expand the existing system with additional functionality and connect different types of sensors. Thanks to serial communication (I2C or SPI), the need to use cabling is kept to a minimum.
Mux Shield II - lead expander for Arduino
Mux Shield II by SparkFun is a popular lead expander compatible with the Arduino microcontroller. Connecting an expander expands the microcontroller’s usability by increasing the number of free input-output pins to 48.
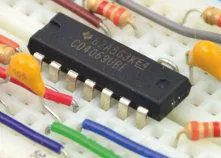
The base of the Mux Shield II lead expander is three analog circuits that allow the expansion of available Arduino digital and analog pins. With them, you can connect more accessories and devices to the board, including buttons, LEDs and various types of sensors. Connecting the Mux Shield II moves the connectors to the side of the Arduino. Such a solution provides free access and easy connection of accessories.
Technical parameters of Mux Shield II
Mux Shield II lead expander offers as many as 16 digital inputs/outputs and 16 analog inputs/outputs. In addition, it can be expanded to 48 inputs/outputs using all three expander chips. Mux Shield II pins are accessible via Arduino-compatible connectors. The Mux Shield II expander is powered directly from the Arduino.
The application of the Mux Shield II lead expander is very wide. It is most often used in various DIY projects, as well as during prototyping. In addition, together with the microcontroller Arduino is used in projects Smart Home, in robotics and automation. In addition, the expanders are used for projects whose main purpose is to monitor environmental conditions. The ability to quickly and easily connect sensors that measure air temperature, humidity, pressure and wind speed allows you to design your own weather station.
Additional information about Mux Shield II
Mux Shield II lead expander is a practical solution for users who want to extend the functionality of their existing platform, without having to buy a new microcontroller. Mux Shield II is simple and intuitive to use, so it can be used even by electronics beginners and hobbyists.
Qwiic Mux Breakout module compatible with Arduino
Another interesting proposition is the module Qwiic Mux Breakout. The device is equipped with an 8-channel TCA9548A multiplexer.
The multiplexer allows up to eight different devices, such as sensors, displays and motor controllers, to be connected to a single I2C bus of a microcontroller (such as an Arduino). Such a solution not only reduces the use of available pins to a minimum, but also facilitates the management of complex systems.
In addition, the I2C bus allows you to change the address, making it possible to connect up to 64 12C devices. In addition, the Mux Breakout module is equipped with QWIIC connectors that allow the connection of accessories, without the need for soldering.
The module’s high-performance core, the TCA9548A chip, allows stable operation of 8 channels at the same time. At its core is the TCA9548A chip. The module is designed to operate from 1.65 V to 5.5 V, making it widely compatible with microcontrollers.
Application of SparkFun Qwiic Mux Breakout Module
Qwiic Mux Breakout module is used to extend the capabilities of various types of systems that are based on microcontrollers with a limited number of pins. The Qwiic Mux Breakout module by SparkFun is widely used in various Internet of Things (IoT) projects and to support simple and complex systems (e.g., control). In addition, the Qwiic Mux Breakout Lead Expander will prove useful wherever there is a need for efficient management of 12C devices.
How to connect a lead expander to an Arduino microcontroller?
Connecting a lead expander to a microcontroller Arduino depends on the specific expander model and communication method (e.g.12C). The first step is to identify the 12C pins located on the board. The next step is to find the corresponding pins on the lead expander (they can be labeled SCL and SDA).
Connecting the power supply requires connecting the VCC (power supply) pin of the expander to the 5 V pin located on the Arduino microcontroller. Then the GND pin of the expander needs to be connected to the GND pin of the Arduino. In the next step, connect the SDA and SCL pins of the expander with the SDA and SCL pins of the Arduino. The final step is to test the connections.
How useful was this post?
Click on a star to rate it!
Average rating 0 / 5. Vote count: 0
No votes so far! Be the first to rate this post.


