Which display to choose for the Raspberry Pi?
Due to the high popularity of Raspberry Pi boards, a great many manufacturers are creating dedicated displays and matrices for these devices. In addition, they also work with a large proportion of standard PC monitors. All this makes it very easy to choose a model that will work for your electronic project.
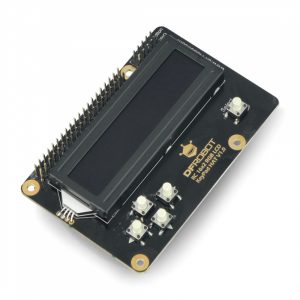
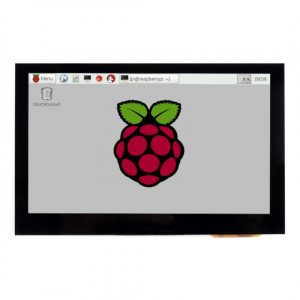
When making your choice, it is worth paying attention primarily to compatibility with the version of your Raspberry minicomputer and matching the technical parameters to the requirements of your project. For example, a simple alphanumeric display will work just fine for an alarm clock or radio, while a touchscreen LCD or LED display will be necessary when building more advanced hardware, such as your own tablet.
What types of displays work with the Raspberry Pi?
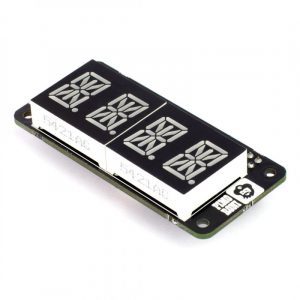
The market offers displays made in almost every technology – liquid crystal, LED, OLED or e-paper, colour and monochrome, touch or otherwise controlled. They range from screens capable of displaying all content to matrices with single programmable LEDs or segmented and alphanumeric displays.
Raspberry Pi displays are offered by brands such as Pimoroni, Waveshare, Adafruit and DFRobot, as well as the Raspberry Pi Foundation itself. In addition, the board can be connected to many models of ordinary computer monitors that have the appropriate specifications.
Various connectors and mounting methods
The vast majority of Raspberry Pi displays are connected via HDMI (miniHDMI on Raspberry Pi Zero and microHDMI on Raspberry Pi 4). A Composite connector is also available, and the 4th generation minicomputer also has a dedicated DSI connector. Designed specifically for the Raspberry Pi, the displays are often mounted like HAT caps, on GPIO pins. The display can also be connected via wires to goldpin connectors.
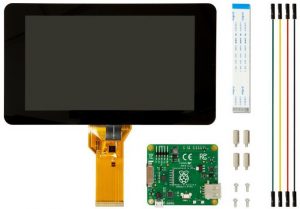
Official Raspberry Pi Foundation touchscreen display
For now, the Raspberry Pi Foundation has only one official display model available, which is compatible with several versions of the board. These are the 4B, 3B+, 2B, 1B+ models.
The display is a seven-inch capacitive touchscreen with a maximum resolution of 800 x 480 px, which connects to Raspberry Pi minicomputers via a DSI connector.
How to connect the Raspberry Pi display?
Although Raspberry Pi displays use different connectors and manufacturing technologies, connecting them usually follows a very similar pattern. Below are the next steps in this process.
Connect display to the board
Firstly, connect the display to the Raspberry Pi board using the appropriate connectors. It is worth remembering that many displays require an additional power supply (for example via microUSB), so you need to take care of this connection as well. For displays connected via goldpin, it is worth paying particular attention to ensure that they are connected to power pins with the correct voltage (some displays work with 5 V and some with 3.3 V).
Install the appropriate drivers
Some displays, particularly computer monitors that use an HDMI cable, can work with the Raspberry Pi on a plug and play basis – this means that they will work as soon as they are connected. However, in most cases you will need to use the appropriate drivers or update your system. Often this is literally just a few lines of code – for example, this is what the commands look like to run the official Raspberry Pi touchscreen (a system update, as the drivers are pre-installed):
Attention!
Make sure your Raspberry Pi is connected to a stable internet connection when downloading and installing drivers and system updates.
Finally, simply reboot the board and you’re ready to enjoy your new display, which will give your Raspberry Pi even more character.
Calibrate the display
In some cases, especially with touch screen displays, additional calibration is required. Detailed instructions on how to calibrate specific display models are provided by their manufacturers. It is also worth checking forums, such as the Raspberry forum, where problems are reported and solutions presented.