Table of Contents:
Arduino is one of the most popular development boards among electronics and robotics engineers. Learn how to connect a display to it.
Which display for the arduino?
Before you learn how to connect your display to Arduino, it’s worth to think about what exact task it’s going to perform, to choose the right type and model of display. Commonly used with Arduino are 2×16 alphanumeric LCD displays (capable of displaying 2 lines of 16 characters each) with green or blue backlight.

In the offer of electronics shops you will often find e-paper displays as well – their main advantage over other screens is much lower energy consumption (due to the type of technology) and a unique image that looks literally as if the content was written on paper. The biggest disadvantage of this solution is of course the relatively high price per unit.

Shops often also offer larger versions of LCD displays, 8-segment displays, touch screens and many other solutions. The choice should be made based on the needs – for example, if the project is commercial and the device will be used in sunlight, and low price is not a priority – no backlighting will be an advantage and an e-paper display will work well for this. In a project where the device will only need to display a single number – an 8-segment display will work well. Nevertheless, the most popular choice remains the 2×16 LCD, which works well for most projects and is particularly popular with electronics beginners and students.
What to prepare for connecting the display to the Arduino?
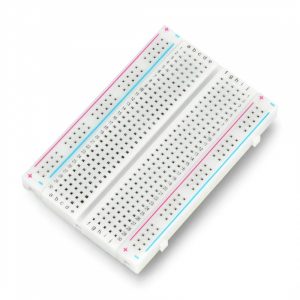
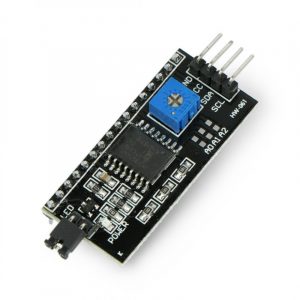
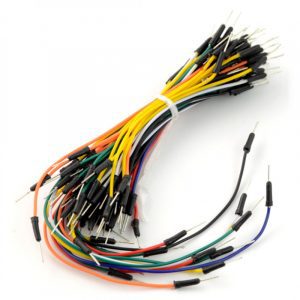
Due to its high popularity and usefulness, below we will describe how to connect a 2×16 LCD display. This type of equipment is usually sold as a display on a laminated PCB – some products have the I2C converter soldered in, but some models do not have it. In this case such a converter must also be prepared to realise the project. To complete the whole task it will be practical to use a contact board, thanks to which you will be able to reuse each of the used elements many times – also in other projects. Prepare also a set of connection wires (with male and female plugs on their ends) and goldpin strips (male and female).
CHECK AT STORE
CHECK AT STORE
CHECK AT STORE
How to connect a display to the Arduino?
The first step is to solder a female goldpin to GPIO pins on Arduino board. Thanks to this, you will be able to connect any device in any configuration and use for example dedicated frontends (e.g. with male goldpins soldered on). If the I2C converter does not have male leads, a goldpin strip should be soldered there as well. Both components should be connected by correct positioning on the contact board. Converter should have 4 pins on output – it will be power supply (VCC), ground (GND) and SDA and SCL.
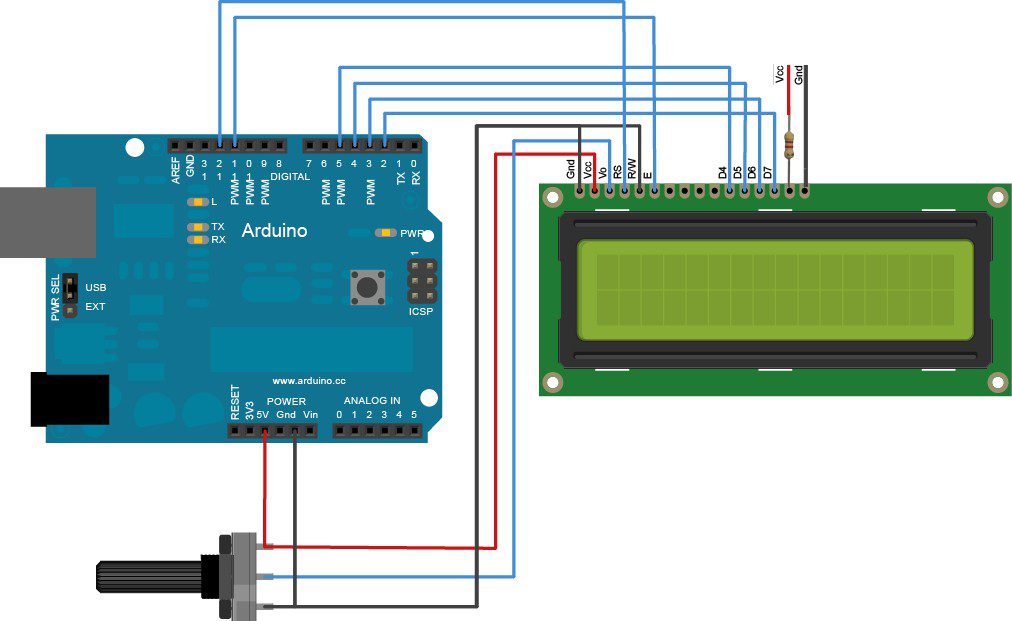
Before connecting the power supply make sure exactly what voltage your display requires – it will be 3.3 V or 5 V. Based on this information, connect the VCC pin from your converter to the corresponding voltage on your Arduino board. Of course, you can power the display with an external power supply, but this will only make sense if you connect more components to the board. The GND pin should be connected to the GND pin on the Arduino, and the SDA and SCL pins to the analog inputs on the board.
After connecting the power supply to the board, the display should work. However, it’s worth to remember, that in order to display anything, you have to program any content first. For example your name or a sequence of numbers. If the image is not clearly visible, there is a brightness or contrast control on each display. If a potentiometer is not built in, it is certainly possible to take the appropriate pin out on a contact board, where you can connect the appropriate resistor (or potentiometer) yourself and make the image readable.
Other ways to connect the display to the Arduino
Oczywiście sposobów podłączania wyświetlacza jest bardzo wiele – te różnią się między sobą przede wszystkim w zależności od wyświetlaczy, ale także w zależności od przyzwyczajeń elektronika oraz od zadania jakie wyświetlacz ma spełniać. Nawet wśród najprostszych wyświetlaczy LCD 2×16 różnice między modelami mogą być stosunkowo duże, dlatego za każdym razem zapoznajmy się z dokumentacją techniczną, nawet jeszcze przed jego kupnem, aby uniknąć niemiłego zaskoczenia, kiedy staniemy przed problemem z podłączeniem lub przedwczesną diagnozą o uszkodzeniu sprzętu.