


Visual Micro - Arduino Programming in Visual Studio environment
Visual Micro is a free extension adding full capabilities of Arduino development environment to Visual Studio from 2008 to 2013.
It is fully compatible with Arduino IDE and uses the same libraries, sketches and other tools. The main difference lies in the interface coming from Visual Studio, which provides more professional features, such as
- The main difference is the interface coming from Visual Studio, which provides more professional features, such as the ability to view and edit the library,
- jump to definitions in the program code, to compilation errors,
- intellisense function (syntax hinting),
- memory of the Arduino version for the project
Installation
You will need the following programs to install VisualMicro:
(Note: Visual Micro does not work with Visual Studio Express versions)
- Download and install Arduino IDE. Visual Micro uses its features, so it requires that the original Arduino IDE is already on disk.
- Download and install Visual Studio. Visual Micro uses it as an environment for programming and uploading sketches to Arduino board.
- Download Visual Micro. To install it, make sure Visual Studio is closed. Then you can run the installer.
Configuration of Visual Micro on first run
After the installation of Visual Studio, the configuration manager appears, where we can set the basic parameters.
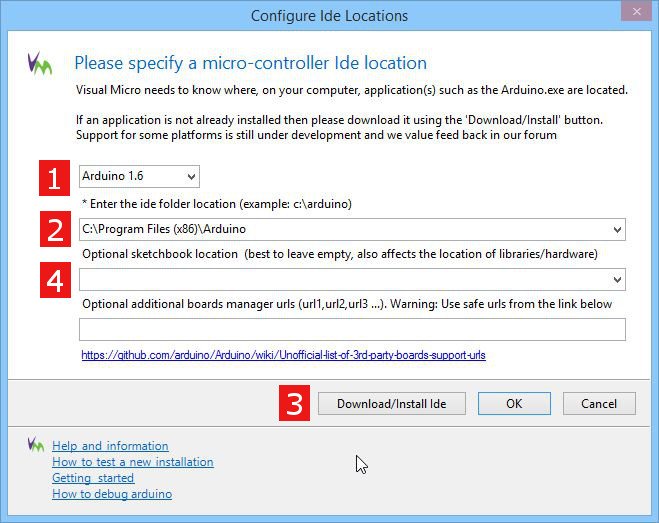
Shows which version of the original Arduino is installed.
2. indicates the folder with Arduino IDE installation.
3. if you haven't installed Arduino IDE yet, you can do it now.
4) Advanced functions that are not necessary for initial configuration.
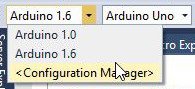
If you want to use different versions of Arduino IDE, or if you have already installed several versions, please configure each of them separately. While writing the code, you can choose which IDE you use using this list:
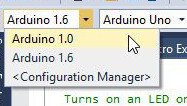
At any time you can add a new configuration or modify an existing one. To do so, select Configuration Manager.
First project
In the original Aruino IDE, programs are called sketches. These are files with .INO or .PDE extensions placed in folders on disk. In Visual Studio, programs are called projects, which also contain several additional files that make up a complete program. Visual Micro can create projects from existing sketches as well as create new ones.
Creating a new project
To create a new project click File -> New -> Arduino Project.
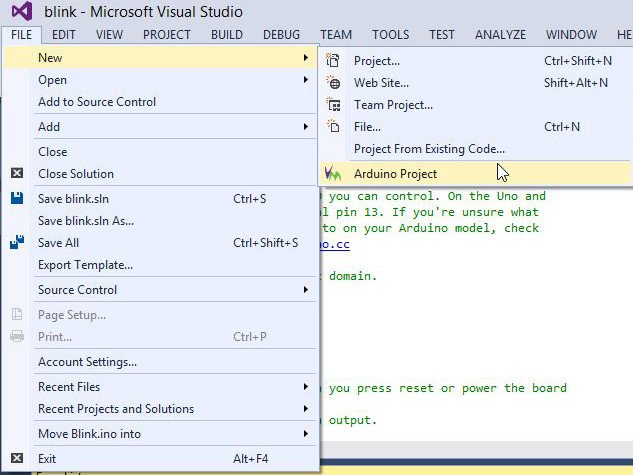
Type in a project name and click OK.

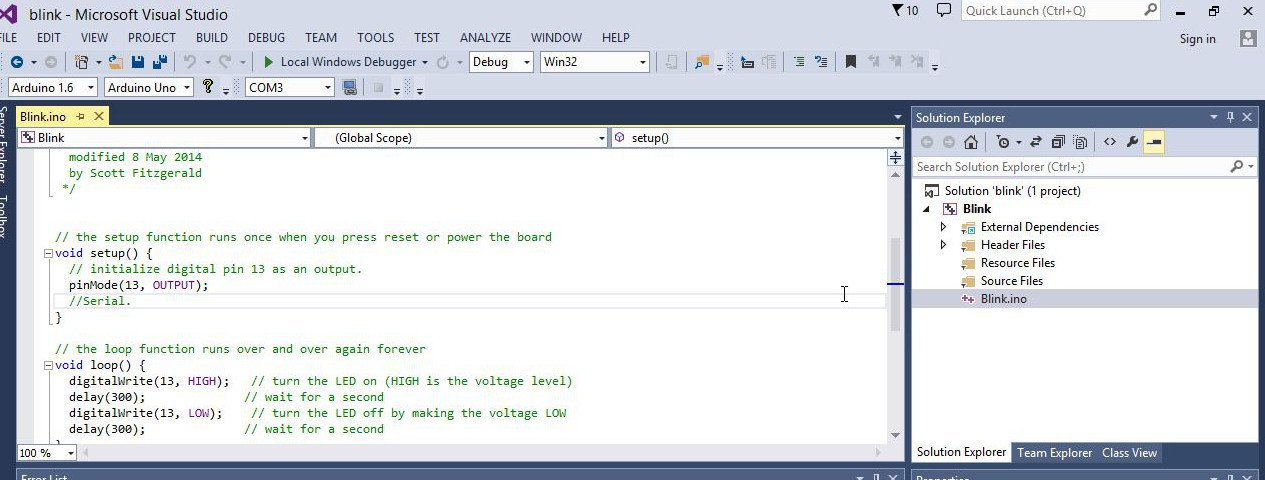
New project contains empty setup() and loop() functions just like in Arduino IDE. Now you can write your own code.
Opening an existing sketch
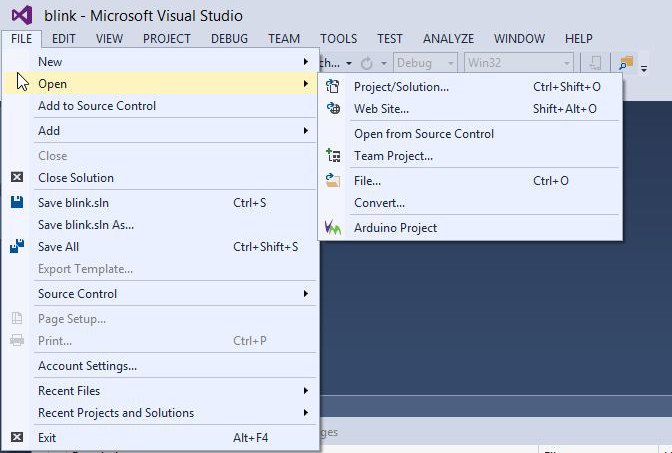
If you already have a sketch created in classic Arduino IDE you can use it in Visual Studio project. Click:
- File -> Open -> Arduino Project ( by choosing a file with the extension *.ino or *. pde)
- File -> Open -> File
Setting up the Arduino and connections
Just like in Arduino IDE, there are a few settings to be made before you can load the program on the board. First we choose Arduino type (in this case Uno). If we use several configurations, we should also choose the right one.
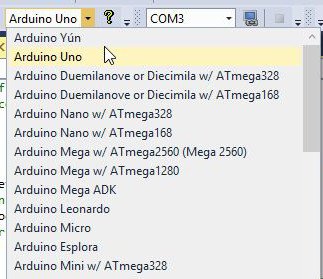
Then choose COM port, assigned to our Arduino.
![]()
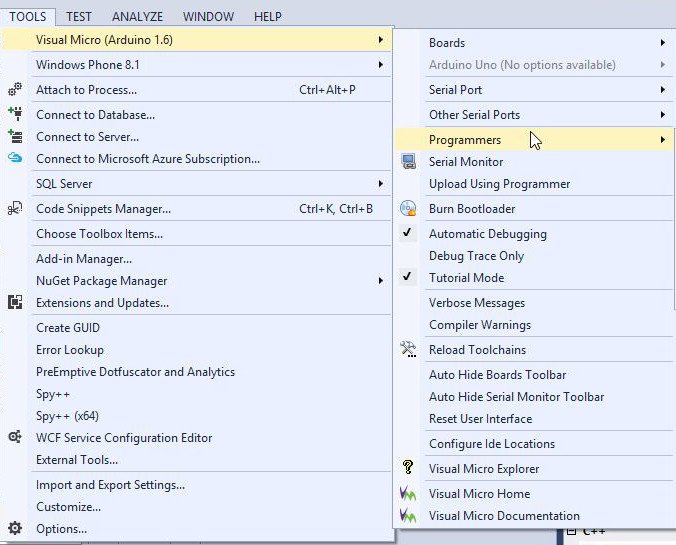
These options, as well as programmer selection are also available in menu Tools -> VisualMicro
Compilation and upload of the project
If we have connected Arduino correctly, we can now proceed to upload the program. In the simplest way you can do it by clicking F5 key or green arrow on the bar.
![]()
The program will be compiled and then uploaded on Arduino board. The progress of loading sketch can be observed in Output window.
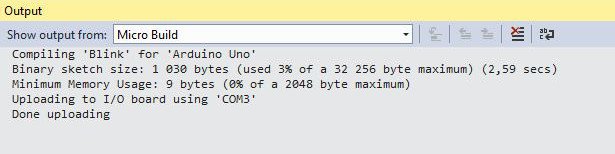
In the example above, Debug option is checked, which creates two compilations. One with VisualMicro debugger code, and the other without. Debugger is available in paid Visual Micro version. Details can be found here.
If you just want to compile the program, but without uploading, click F7 or from Bulid -> Bulid Solution menu.
To save time, Visual Studio compiles only uncompiled files and those in which there were changes. Sometimes, however, after changes in e.g. #define definitions, you have to compile the whole from the beginning. For this purpose the option Build -> Clean Build is used .
Compilation errors
If the compiler encounters errors, it displays them in the Output window.
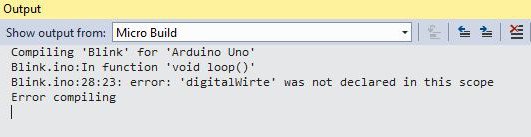
Double clicking on the error line will take us to the place in the code where the error occurred. With F4 and Shift+F4 keys, we can jump to the next and previous error. However, the Error List window is more useful for error handling ( if it is not visible, we can call it from the View -> Error List menu ).

-
Errors - errors that prevent further compilation
-
Warnings - errors that do not stop compilation, but can cause complications in program execution.
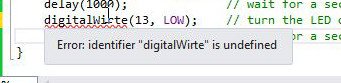
Double clicking on a bug takes us to the place where it occurs. Visual Studio has a technology called Intellisense. It improves code writing:
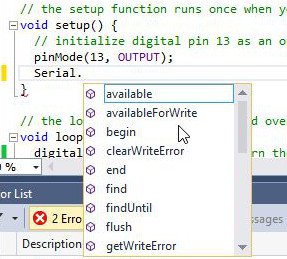
and tries to help fix bugs. In this example, the syntax of the bug is highlighted, and when you hover the mouse over the bug, a hint is displayed.
Intellisense detects bugs even before compilation, which makes writing the program much easier.
Error handling tips
Sometimes the number of errors displayed is very high. Most often it is due to a missing semicolon or curly bracket. You should then click on the first error and check if something is missing. If we suspect a problem with a curly bracket, we can mark a bracket and after clicking CTRL+], we will be moved to the corresponding second bracket (depending on the first one, opening or closing).
Adding libraries to the project
To add a library to our project, select Project -> Add/Import Sketch Library -> Core and one of the installed libraries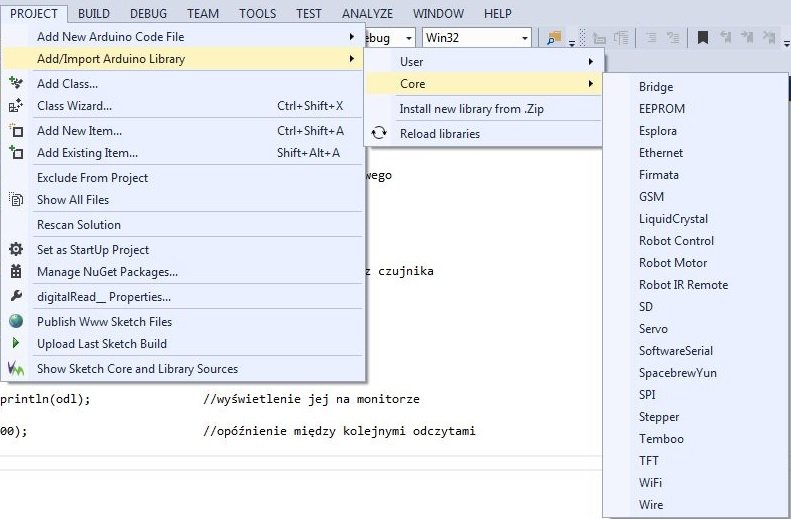
The attached library will appear as #include
Visual Micro library service
Visual Micro has a library manager that helps to manage libraries. It is located in Tools -> Visual Micro -> Visual Micro Explorer menu under Manage Libraries tab.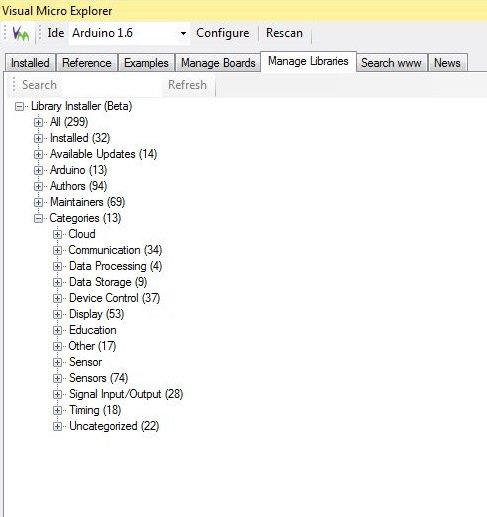
The options shown on the screen allow you to install or uninstall available libraries. These are
- All - shows all available libraries, installed and uninstalled in alphabetical order.
- Installed - Shows only installed libraries. By clicking on them we can uninstall them.
- Available Updates - Shows the installed libraries that have available updates. Clicking on them will update the library.
- Arduino - Shows all libraries provided by Arduino. Most of them are already pre-installed.
- Maintainers - Groups libraries by maintainers (people who deal with libraries after publication by the author).
- Categories - Groups libraries by category
Use of examples from libraries
Most libraries provide simple examples of their use. In Visual Micro, to use these examples, select the Tools -> Visual Micro -> Visual Micro Explorer tab from the menu. Examples.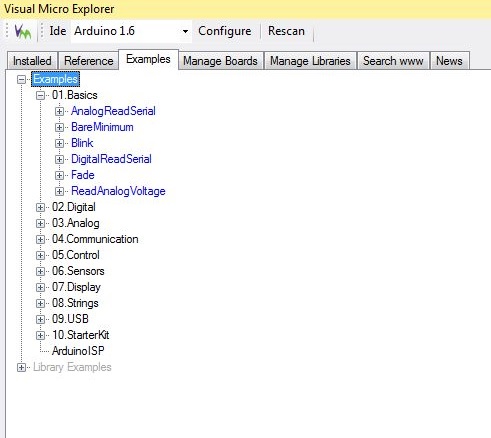
When you click on one of them, the following selection window appears: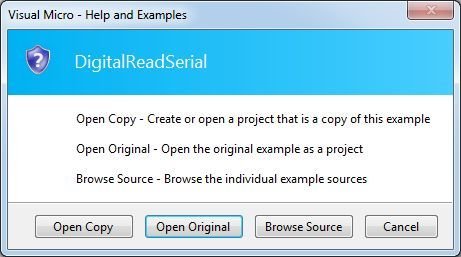
- Open Copy - Creates a new project as a copy of the example and places it in the folder with Arduino projects.
- Open Original - Opens an example as a project in its original location. This way we can modify the example from the library. This option is not recommended.
- Browse Source - Opens the file tree and lets you select a single file. Does not create a new project. However, this option opens the original file, so it is recommended to save it immediately under a different name.
This tutorial is to show Visual Micro's capabilities and show that it can become a good alternative to Arduino IDE, where many possibilities are missing. Full Visual Micro documentation can be found on the project home page: http://www.visualmicro.com/
.